Tuesday, January 2, 2018

Bob Stroller Review

My son is now a happy, full of energy 21-month old, and by now I feel experienced enough of a mommy to tell new moms what they really do and do not need to register for.  One of my favorite "big ticket items" that we were blessed enough to be gifted at our baby shower was our Bob Revolution Pro stroller.  This is the chariot of all strollers- it has the smoothest ride, and can go just about anywhere.  My son is comfy, even on bumpy trails, and I love the brake for jogging around our neighborhood in the mountains.  Plus, the extra big shade helps keep him happy and protected from the sun any time of day.
Hubby pushing a sleepy Canyon while hiking at South Yuba River State Park

Got to hike along this beautiful trail while pushing the Bob!
Any Bob stroller is a big purchase, and I fully believe in being frugal and smart with your money.  That being said, I truly believe the Bob was worth the investment if you want to be active with your baby and/or toddler.  Here's why I believe it was worth the hefty price tag:

  • You really can go just about anywhere with this thing.  We have taken it hiking for miles, and so long as the trail is wide enough, it can pretty much make it. You can do the same with a carrier for your little one, but the stroller helps save your back.
  • We decided to request the Bob as a gift at our baby shower, instead of a fancy hiking pack like this Osprey pack.  I believe that was a good choice because there is only a small window where it's practical to hike with your baby on your back (from about 6 months- 18 months).  My son is 31 pounds at 21-months old, and I still hike at times while carrying him, but I much prefer not carrying him if I don't have to! 
  • I have really gotten my use out of this stroller- and it has honestly helped to keep me sane.  I need to be active to feel happy, and as a new mommy, feeling happy is vitally important to your mental health.  
  • You can use this stroller from birth with a carseat adapter, up through toddlerhood (actually, the weight limit is so high, it could technically be used throughout childhood... I have even heard of folks using it for disabled kids).  I believe it is worth investing the most in products that you will be able to use for a long time.
  • I prefer the Bob Revolution Pro model because it has a hand brake.  I felt I needed it since I use it to jog in the mountains, especially when there is road rocks on the streets after winter.  I think we could have gotten by without the hand brake, but I am glad that I have it.  Honestly, it was most useful right after having my son, when I felt the most weak while walking.
  • Hubby displaying the Bob's skills ;)
  • Lastly, they hold their value.  You could easily sell this stroller when you are done with it for a fairly high price.  Bob strollers are popular for good reason, and they are like the Honda or Toyota of strollers.  In five years when you are done with it, you may be able to resell it for $200-$300!
I have found that a 30-minute interval jog with the stroller is a great almost daily outing.  It helped me get back in shape, and it keeps me and my son happy.  I did have to learn how to properly run with the jogging stroller, however, which I plan on making a future post on.

I hope you find a stroller that you love as much as I love mine!  Blessings to you and your family!


Beautiful Northern California

Tips to Spend Less on Groceries

How much do you spend on groceries a month?  This number can vary a lot depending on where you live, where you shop, how many people you are trying to feed, and how many times a month you eat out.  If you don't know the answer to my question, I encourage you to track your spending to see where you can tighten up.  Who wouldn't want to free up extra money to spend on fun stuff?!

In our family of three, we typically spend an average of about $300 per month on groceries.  I didn't realize this was a fairly low amount until talking to various friends and family members.  The first friend I told this amount to told me I was probably wrong in my calculations :)... Well, after tracking for a few months, turns out I was right!  Actually, it is usually more like $250 per month, but I thought I would leave some wiggle room.

I thought I would share some tips with you all as to how we shop, in hopes that you can save some cash for other fun stuff!

(Keep in mind that we like to eat out 1-2 times per week, and we live in Southern CA, where I believe food is fairly affordable).

1.  Focus on nutrient dense foods
2.  Buy in bulk food items that will last a long time
3.  Don't buy in to the Costco hype
4.  Utilize leftovers
5.  Only go grocery shopping 2 times per month
6.  Stock up on staples
7.  Don't drink your calories
8.  Pay attention to price tags
9.  Shop sales and know seasonal produce

We typically spend about $120-$130 per shopping trip, so monthly that adds up to an average of $250.  However, there are sometimes odds and ends that we run to the local (more expensive) grocery store so I added a cushion of $50 in my typical average of $300.  I hope this helps you, please comment if you have any money saving suggestions of your own!

Thursday, October 5, 2017

Letter to a New Outdoorsy Mother

Dear New Outdoorsy Mom,

I know you.  You want to get out there as soon as you can.  Sure, you are sleep deprived and still healing from childbirth, but you won't let that stop you.  Or rather, you're afraid that it will stop you.  You fear that part of your identity will be lost.  Right now your day consists of changing diapers, your boobs hurt, you're flabby like you have never been, and while you are so in love with a new little human, you wonder.  Is this what life is going to consist of from now on?  Does being a mom literally mean that taking a shower is the most exciting, rewarding goal of your day?  You don't know the answer to this... so you make goals.  Lofty goals.  Maybe even tougher goals than you had before you were pregnant.  You are going to climb a big wall.  Hike the PCT.  Kayak a class five.  Eight months should be enough time to accomplish your feat.  Yeah, you can make it happen.  You are very strong, after all.

While you probably could make it happen (like I said, you're very strong), I have to tell you that you don't have to.  Yes, you should make time for the things you love.  You should get outside as soon as you can.  But, new mom, this stage of life will not last forever.  You don't have to be afraid of losing your outdoorsy identity.  You don't need to overcompensate with lofty goals.  Take each day at a time.  Enjoy those new stroller walks with your sweet babe.  Walking to the park is OK for now.  You will climb a mountain again, and sooner than you think.  Time will slip away, and soon you will miss your little stroller buddy (side note- please do me a favor and don't go get a teacup poodle to start pushing in your stroller... then I will have to write you a completely different type of letter...).

My point is this, dear sweet new mommy, you have just done the most amazing thing ever: you grew and created a new little life.  Leave the "mom guilt" behind, and be free to be happy.  Someone said it best when they said, "the days are long, but the years are short."

Be free and be happy,
Me

Thursday, September 21, 2017

Local Hikes: PCT from Inspiration Point to Grassy Hollow

I had the pleasure of going for a short hike by myself the other day.  I must say that there is a certain freedom and joy in going for a walk in the woods all alone.  I feel like I tend to notice more than when I am with a friend.  Granted, I definitely have heightened awareness and tend to spook easier, but when I get the chance to hike alone I usually take it.

I have been going hiking around Grassy Hollow a lot lately.  The higher elevation makes it cooler in the scorching summer months, which is even more important now that I am often hiking while wearing a baby.

If you're looking for a short local hike to get some exercise, I recommend any segment on the PCT.  Around Grassy Hollow area, there are a plethora of different loops you can take.  From Inspiration Point (or "Inspo" as the kids call it), there is a large parking area to the North and South.  Park in the North lot, where the outhouse and horse stalls are at.  From here, head North on the PCT (though at this point of the 2,650-mile trail, it is more like West... so we will say head North-West).  If you're one of those people that always want the description in "left or right" terms, then head left as you are facing the outhouse.

The trail is refreshing and the elevation is nice and hilly.  

Tuesday, January 24, 2017

Getting Outdoors with Your Baby: Warm Weather Clothing and Eating on the Trail

Today is part two of my series on tips for getting outside with your little one.  This video is a continuation of last week's discussion on how to dress the baby.  It can be tricky if its hot out- you want to keep the baby out of the sun, but you also don't want to put on so many clothes that they overheat!  Keep in mind that it can be even warmer in the carrier, especially if they are close to your chest!

In the last video I referred to a washcloth-type-thing that is made for hot weather that you could use to stick in your baby carrier in hot weather.  I don't know why I seem to remember it being called a "froggie" or something- but I think I'm totally whack.  Must be the teething and lack of sleep that has be making things up.  But I did find something similar on Amazon here so you can get your froggie (that's what I'm calling it anyways).

This video also covers eating on the trail- pretty similar to eating when you're out and about, but you may just want to make sure you feel like you know what you're doing before you go outside.  Let me assure you- you know what you're doing!  You got this, momma!  (or dadda, or grammy, or grampie...)


Thursday, January 12, 2017

Getting Outdoors with Your Baby : Clothing, Carriers, and Packs

This post is something new for me- a video post!  All about hiking with your little bundle of joy.

I have been slowly recovering (still not 100%) from childbirth almost 10 months ago- BUT I have been able to enjoy getting outside and being active. (You can read my last post on my birth story here if you're interested)

This is the first video of a four part series.  This post will cover how to dress your baby, and I talk about my baby carrier.  Also, what to do to carry your water, snacks, diapers, etc... AND carry your baby (oh yeah- don't forget the baby!)

Have a watch and take a look at the photos.  Hope you enjoy!
Such a happy baby when he's outside!


Notice our super awesome stylish warm long muslin triangle wrap technique.  One more layer for these winter hiking days.


Even our baby enjoyed these views of Mt. Shasta.


I am breastfeeding in the above photo and you can't even tell!  My awesome friend Sarah is carrying our pack full of trail necessities AND her baby.  What a gal.

Yeah, so I was kinda out of shape when we went to Yosemite, so luckily my friend Deanna is super fit and could carry my baby for me.  Notice Canyon's lil hat.  It lets in airflow and creates shade, plus has a velcro strap so it won't fall off.

Can-man passed out on the boat.  The muslin swaddle kept him cool but covered.


Had to get one family shot in there... :)

Sunday, July 31, 2016

Canyon's Birth Story

I have taken a looong break from blogging, and for the record, I hate it when I read a blog and the blogger spends time apologizing for not writing for an extended time. It's like get over yourself, if I am reading this its because I googled something and your blog popped up... I have no idea how often you normally blog...B U T I feel like I kinda got a good excuse here to say that I haven't blogged in a while... I had a freaking baby! Of course I feel the need to write about my experiences with him, so he may be the subject of some posts from now on... but I digress. Here is the story of his arrival with likely too much detail for the average reader, but just enough for myself (I am sure my future self is thanking me riiight now). So... here's the story:

Canyon Nehemiah Overduin was born March 16th at 5:14 pm at Fontana Kaiser Hospital.  He weighed 6 pounds and 4 ounces (tiny though he was 6 days overdue! He was in the 3rd percentile for weight).

Canyon’s birth was pretty crazy (though I am sure every new mom feels this way about their labor and delivery!).  I basically did not follow the typical signs of labor progressing.  My contractions were 10 minutes apart up until about 15 minutes before I started pushing, and the closest they ever got were about 5 minutes apart.

On Friday the 11th (my due date was the 10th) I woke up in the middle of the night from some fairly painful contractions.  After they didn’t go away after an hour and were about 10 minutes apart, I decided to wake up my husband.  At this point I wasn’t completely sure if what I felt were in fact contractions.  For me they felt like period cramps at first, then I could feel tightening up to the top of the uterus.  My husband could see my stomach tightening, too.  After about an hour the pain went away, but I could still feel periodic tightening.  Eventually they died out and we went back to sleep.  This was the first of our bad nights of sleep :)

During Sunday I felt these contractions off and on.  We thought I was probably in pre-labor (yay!) which I was happy about especially since my OB wanted to induce me, though she was respecting my wishes to wait until I was 41.5 weeks, which I really appreciated (there was no medical need to be induced).  Sunday night they were painful enough to wake me up again, and that I needed to breathe through them.  I am accustomed to very painful periods that I also need to breathe through, and I teach yoga, so this came pretty naturally to me.  I found that I simply used the long inhale and exhale with an “O” mouth during my entire labor.  It was simple and allowed me to visualize what was happening in my body.  I visualized my cervix opening and the muscles of my uterus like blue ribbons (a technique from the hypnobirthing method).  Sometime on Monday I started to have bloody show, which continued up until Canyon’s birth.

My contractions continued throughout Monday, but were spaced pretty far apart.  It seemed that my labor always picked up at night, and by Tuesday at 2 am, I had 3 contractions in 10 minutes so we headed to the hospital.  We live about an hour away, and I had been in labor for a while so I didn’t want to wait too long.  This was the closest my contractions ever got before pushing (though I didn’t know it at the time), however, once we got in the car my contractions slowed down to about 1 every 10 minutes again.  In triage they examined me and said I was about 3-3.5 cm dilated and after 2 hrs of monitoring I was about 3.5-4 cm.  The nurse and midwife had looked at my birth plan on file and since I did not want any interventions or drugs, recommended that I come back when I have progressed further.  We went to Denny’s in hopes of making some progress, but then ended up going back home for another night.  At home I walked about a mile and a half, sat on the birthing ball, sat on the dilation station, did it all!

By Wednesday morning I was getting exhausted.  My husband had the routine down by now.  Every time he heard my breathing, he would bring a cold rag with lavender oil on my forehead and cheeks.  This happened all through the night so we woke up every 10 minutes for three days.  I was ready to do about anything to get this baby out of me.  I called the advice nurse and she said to stay home until my contractions were 3-5 minutes apart for 2 hours, which is the same  advice they gave me at the hospital.  I asked if it was normal to feel like this for so long to which she said, “girl, I was 4 cm for a month!”  This was crushing news.  I could not see how anyone could live like this for a month.  Looking back, I am sure that what I experienced was very different than what she experienced.  I had missed my last OB appointment the previous day (Tuesday) since I was at the hospital.  I knew they were going to start doing non stress tests on me since I was overdue.  I decided to call to schedule one, or try to talk to my OB.  My Ob was out, so I made the appointment for an NST.  Thank God that they had an appointment the same day at 1 pm.

We drove back down for the appointment, my contractions still 10 minutes apart and just as intense as they had been the whole time.  They were definitely too difficult to talk through and maintain focus on my breath.  When they examined me, they found that my fluids were low, so they said they were going to “induce” me (whatever that means when you’re already 4 cm).  I went across the street to the hospital and was settled in by about 3 pm.  As I was walking to the delivery room the OB commented, “you’re looking pretty good for being 4 cm!”  Well, once I was examined by the nurse she exclaimed “I can’t believe you’re not feeling this; you’re at 7 cm!”  I was shocked and so very happy!  I had mentally prepared for the worst but was so pleased that I was progressing even though my contractions were spaced far apart.

I told the nurse before I was examined that I preferred a natural childbirth, but that I was at the point where I would pretty much do anything to get this baby out.  We decided to wait and see how it went, and obviously once we knew I was at 7 cm the answer was clear.  I didn’t even need them to break my water.

Thank God I went in for the NST; I progressed extremely quickly but I still had the outer symptoms of being in early labor.  Within about 2 hours I was fully dilated and I pushed for about 10 minutes.  No drugs or interventions needed!  My bag broke once I reached 10 cm (though Canyon still had the bag partially around him and there was some debate by the nurses if my bag needed to be broken), where I IMMEDIATELY felt not only the urge to push, but the uncontrollable reaction by my body.  Had I not come for the NST I would have given birth at home!


The first two pushing contractions were kind of a mess.  But once I understood what my body was doing, I was able to focus and use “J breathing” to help birth him.  I felt like I could have birthed him slower so that I wouldn’t tear, but they were telling me the baby’s heart rate was dropping so I needed to push hard.  This of course gave me ultimate determination.  In my hyper-focused state I realized one of the nurses was on the phone requesting an immediate O2 tree; there was supposed to be one there and there wasn’t.  I realized even more that I needed to focus and listen to instructions.  They told me to breathe deeply during contractions and helped me push more effectively.  I got him out in about 4 pushes, but it was all such a blur that time slowed immensely.  I don’t remember when my Mom walked in the room, but I remember her saying, “I can see his head!”  Once he was born and brought right to my chest, I was filled with wonder.  All I could say is “Oh my gosh!” Over and over again.  He was beautiful, and I felt as though I recognized him from one of the later ultrasounds I had done.  His umbilical cord was still attached and really cool looking; it was curly!  I birthed the placenta with the next contraction; and I was surprised that this also hurt.  Everyone says it’s no big deal, which is true, but it’s not painless.  I requested to look at the placenta, which seemed huge!  Honestly, the worst part for me was being stitched up.  I had 2 tears and needed 2 stitches.  I also bled a lot, likely because I had high blood pressure.  They were very close to putting me on blood pressure medication while I was in labor.  The nurse said it was likely because I was internalizing the pain of labor.  Ummm, yeah I would think someone in labor for 3 days might have slightly elevated blood pressure!  But the tears are worth it to know Canyon is healthy.  He was alert from the moment they put him on my chest, but didn’t cry until they suctioned him, and even then for a moment.  A testament to natural childbirth!  After this experience, I actually believe it would be so much more difficult with an epidural.  But this was the right choice for me.  Following your instincts is absolutely the best path possible.

Update:

At four months postpartum I am just recently feeling like I can be active again.  It wasn’t until Canyon was three months that I felt able to work out and be able to do anything in the bedroom (sorry, Mom, hope you’re not reading this!).  It was extremely hard for me to not be active like I wanted to be during this time.  I thought that I did everything naturally, plus I worked out during my pregnancy, so recovery should be a breeze, right??? Well, not in my case.  But I am healing.  I am still not 100%, but I am slowly getting there.  Hopefully in a few months I will feel completely like my old self again.

Wednesday, July 23, 2014

K.I.S.S. Smoothies

I love smoothies.  Cool, refreshing, and delicious... I don't know anyone who can't get down with that.  I used to be somewhat intimidated by smoothie making... I thought it was only on those days where I had extra time to sit around and sip on a straw while sitting on my porch and reading.  But since then I have realized that it's a great go-to meal on busy days (especially when the heat is so intense that you don't have much of an appetite anyways).

The internet is full of inspiration for recipes for smoothies.  I'm just here to remind you of this concept: K.I.S.S. (keep it simple, stupid)!  Sometimes I am overwhelmed with the list of ingredients in these recipes, and then I discovered that pretty much anything works- so if it's in your fridge and it sounds good, try it!

Here's a general guideline as to what I usually include:

Half a cup of kale
2 teaspoons chia seeds
Plain yogurt
1-2 teaspoons agave nectar
Whatever fruit I have on hand
1/2 cup water

Sometimes I throw in some ice, too.  I usually have bananas since it's so easy to buy a bunch, then freeze them so they keep on hand.  Just make sure you break them up in smaller pieces so they blend easily!  Peanut butter is always a tasty addition to a banana smoothie.

I use a regular-old blender, a cheapie I bought for $20 at Target.  There are many fancy juicers and blenders out there, but don't be afraid to use your regular blender!  The important thing is to just try it!

What do you like to include in your smoothies?  I love hearing other folks' recipes!

Thursday, July 17, 2014

Beginning Yoga Series: What Should I Wear to Yoga?

I have practiced yoga for about 6 years.  I remember walking into my first class, unsure of what to wear, what to, where to set up my mat, and what the words or traditions were.  Yoga is meant for everyone, but since it originates from a culture very different than our own, being a beginner yogi can feel very intimidating.  Not to mention the use of an entirely different language (Sanskrit) by some yoga teachers, and some classes that focus on chanting or meditation.  Yoga can feel like a very alienating experience, when it is in fact supposed be a very unifying experience.

I recently began teaching yoga, and through teaching beginners I am reminded of all the emotions I felt at the beginning of my yoga journey.  I wish I had had someone there to guide me through some of the questions I was experiencing in my mind, but did not feel comfortable enough to vocalize immediately.  As a result I will be writing a series of blog posts geared towards those new or newly interested in yoga (or if you just want to learn more).

This post: what to wear to a yoga class.

 Disclaimer: this will surely be geared towards women since I am drawing on first hand experience, and, well, I am a woman.  That being said, men will gain some insight from this post as well.

The first and most important guideline is to be comfortable.  You want to feel confident as much as possible, and what you wear can help your confidence.  Wear clothing that you can move around in, bend over in, and spread apart in where you won't feel overly exposed or restricted.  If you are unsure about an outfit, do these simple tests to see if it will work:

1.) Bend over and touch your toes
2.) Walk around and do a few lunges

How did that work?  Did your pants fall down?  Did your shirt fall up?  Were your pants so tight in the hips that it restricted movement?  [begin radio voice here] If you answered yes to one or more of these questions, this might not be the yoga outfit for you. [end radio voice]

Generally speaking, tighter fitting spandex-type clothing usually works well for yoga (with the popularity of yoga pants today, I am sure all of you had an idea that this was true).  The reason for this is because you can move freely and don't have the problem of shorts exposing your unmentionables as some loose fitting running shorts might do.  A loose shirt may fall up as you bend over in certain poses, and for this reason a tight fitting top may be more comfy (or you could try to tuck in a shirt, but again you likely won't feel as confident like this).  This isn't to say you can't wear running shorts, just make sure YOU feel comfortable in them first.  My first yoga teacher wore running shorts all the time, but I tend to feel uncomfortable and like I might show my undies off at any time... not my idea of confidence.
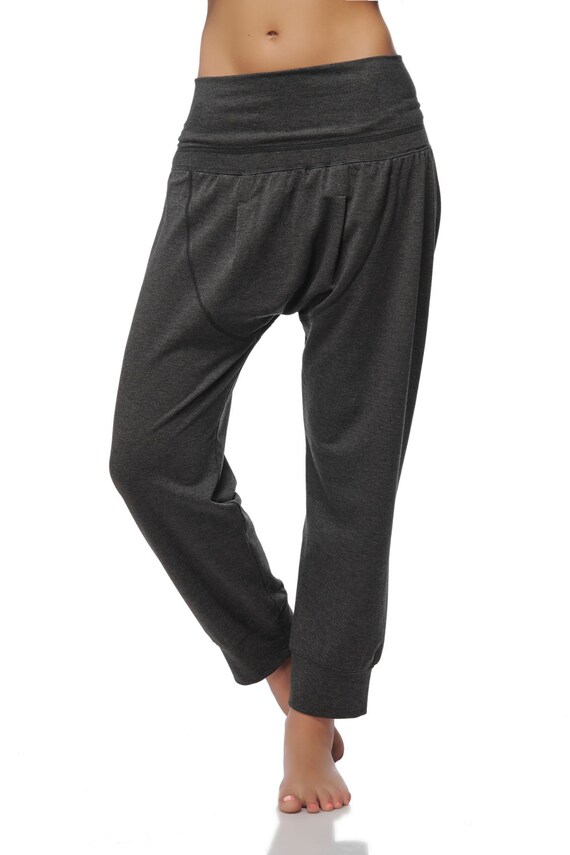
Dropped Crotch Yoga Cotton Pants -Gray Harem Yoga Pants - Loose Gray Cotton Pants
Yoga pants can be baggy!


If the idea of painted-on-looking yoga pants is repulsive to you, check out some new styles of yoga pants.  I have been seeing a new fad of pants that are very airy and baggy; they kind of look like the pants Aladdin and Jasmine wear.  This might be your cup of tea.  Though, I will say that it is helpful from the teacher's perspective to have students with tight clothing in order to check for proper form.

Secondly, wear shoes that you can slip off easily.  Yoga is done barefoot on a mat.  You can wear any shoes you like, but I like to wear sandals or Tom's so that I can easily slip them off right by my mat.

Leg warmers and other layers can be helpful
Thirdly, wear layers.  This tip is somewhat dependent on where your class is at and what type it is.  For example, if you are taking hot yoga, well, it's going to be hot.  Don't really need layers in that case.  The important thing to remember is that you ideally don't want to be cold since your goal is to warm up your muscles sufficiently so they aren't injured during any pose.  If you get cold easily, wear a sweater that's easy to zip off.  I teach outdoor classes, so this point especially applies when there is no climate control.  If in doubt, it's always easier to take a layer off rather than not have a layer to put on.  I really like the style of legwarmers and arm warmers, and they are really practical in this setting.  It's easy to wear capris with legwarmers until you move around and warm up, and then take the legwarmers off.  For outdoor yoga, you may even like to wear a tight-fitting hat to keep the sun off your face.

Fourthly, were your hair off your face.  Like with any exercise, those with long hair will likely find it more comfortable to have it out of your way.

And that's it!  You should be stylin' at your first yoga class!  Really, wear whatever you have and get started on your own personal yoga journey.  You shouldn't feel as if you need to go out and spend money on specific yoga clothing.  Wear what you have that you will feel the most comfortable in.  All I have provided you with are some guidelines that may help you feel more confident in those clothing choices you make.

As a side note, most of these suggestions will work great for when you try rock climbing, as well!

If you live near Wrightwood, California, I want to invite you to attend one of my outdoor yoga classes.  We have a lot of fun out in the mountains together, and I hope you can be a part of it!  Here is my website for more information: http://ceoverduin.wix.com/outdooryoga 

If you have any questions on what to wear, or any specific yoga questions, please leave me a comment below.

Namaste!


Tuesday, July 8, 2014

Local Hikes: Observatory Road


My knee has been giving me trouble lately, and as a result I have needed to take it easy on hiking.  Yesterday I felt up to trying something easy, so my husband and I opted to "hike" Observatory Road (Or, at least this is what I have always heard it called.  I am not sure if this is the real name).  I use the term hike sparingly; it's more like a meandering walk with rolling hills, and just a couple steep portions.  We usually use this road when we feel like running (something my knee definitely can't take right now), and I have had friends who like it to run with a jogging stroller since it is paved and wide.  It's also a great trail for mountain biking.  In all honesty, I am not sure as to what the rules are for being on this trail since it is there for access to JPL Observatory.  If there were ever issues with using this trail there are several hiking trails that intersect the road anyways, so it would be easy to enjoy the area but just avoid the paved road.
Paved path, wide and open, sweeping vistas; what more could you ask for?

The walk to the top from the turnout is 3 miles.  Once at the top, there is a radio tower and an observatory building.  Please do not mess with these buildings!  I want to continue to enjoy the area, and I would hate for access to be shut down due to irresponsible visitors.  {rant now over}

The trail provides 360 degree views.  In the beginning of the walk, there are views of Mountain High East ski resort, and as you continue there are views of the San Gabriels to the South.  Once you meander away from this (and are almost to the top), you will find views of the desert to the North, including portions of the San Bernardino Mountains.  Something that my husband pointed out as being interesting is that you are in a Yellow Pine Forest most of the walk (you know- Jeffery Pines, Ponderosa Pines- basically all the trees you find in the town of Wrightwood), but as you reach the top (and are at a higher elevation) you find yourself among Pinion Pines.  The desert really does meet the mountains at this point, and with views of the desert for miles, you really feel you are indeed on the edge of these two plant communities.  {botany rant now over}

During the summers we like to use this trail for a night hike on a full moon.  There is less chance of tripping over a root, etc. on this smooth trail.  During the day, bring plenty of water since there is a fair amount of sun exposure on this trail.

To get to this road/trail, drive up Table Mountain Road from Highway 2 (this is where there is a fork in the road at Mountain High West; Table Mountain Road is the fork on the right).  Wind up this road, once you have a good view of Mountain High West, pull over in the large turnout.  Park here and walk on the gated road to the East.

Overall, this is a great trail if you would rather "take it easy," or if you want to bike or run it.  The elevation is pretty high (about 8,000 feet), so its great for training for 5k's or 10k's.  Keep your eye out for wildlife!  We always see at least some red-tailed hawks flying around our heads.

Happy trails!

Saturday, July 5, 2014

Local Hikes: Mt. Baden-Powell


The term "local" can be very relative.  If you live within an hour's drive... I am going to say that you're a local.  Wrightwoodians may disagree, but how about I call you the "local locals."  Maybe it's the Southern Californian in me, but I think if you can drive to a place in an hour (including traffic!), then you're a local.  But, I digress!

This is post two in a series of local (or local local) Wrightwood hikes.  If you are in the Southern California area, a drive to Wrightwood is among one of the easiest mountain drives since it is pretty straightforward for a mountain road; no major twists or turns, no incredibly steep drop-offs (until you get past the town), and less chance that you will hit fog on the drive up (especially if you're driving up in the summer... then I would say your chances are pretty dang good that you won't hit fog...).  After this laid-back drive up, you can tackle a pretty serious mountain climb.  Mt. Baden-Powell is 9,399 feet tall, with an elevation gain of 2,807 feet in four miles if you climb it from Vincent Gap trail head.  This trail head is about 8 miles or so West of the town of Wrightwood on Highway 2.  Keep going past Inspiration Point, and the next large parking lot you see immediately off the highway is Vincent Gap trail head.

There's the summit!  And the plaque to prove it.
Named for Lord Baden-Powell, the founder of the Boy Scouts, at the summit you will find a plaque in his honor.  Near the summit there are a few Limber Pines, which are 1,500 years old and related to the oldest tree in the world, the Bristle Cone Pine.  The hike up is strenuous, but is only four miles, so it's not too difficult for someone who is in decent shape.  At about 3 miles, I can usually start feeling the effect of the high elevation (even though I live at about 5,800 feet).  This is not only a good hike unto itself, but it's great to train here for other high elevation hikes.  This hike really helped me prepare for Mt. San Gorgonio and backpacking in the Sierra Nevada, where I was at elevations of 10,000-11,000 feet.

At 1.5 miles up the trail, you will find Lamel Spring as a short detour.  The term spring is used somewhat sparingly, as I have only seen a trickle of water here.  However, in our dry mountains this is a great spot to scout out wildlife.  I have seen deer and other animals (birds, squirrels, etc.) here, and there are also some beautiful vegetation that you would only find around water.  I would say that it isn't something you must see as a hiker, but its worth seeing if you have never been, or if you really want to try to find some wildlife.  As a PCT-er, I wouldn't recommend depending on this source for water after late May, especially if its a dry year.

On average, the hike usually takes us 4.5 hours round-trip (though I have friends who have done it in 2.5 hours!).  I would recommend planning 5-6 hours for your first trip up, just in case.  The trail is fairly steep and full of switch-backs.  Not so easy on the joints coming down (I'm weird- downhill is my least favorite because of the aches in my knees and hips).  If you also have joint pain, I would recommend trekking poles for this hike.

Bring plenty of water in the summer (though most of it is in the shade), and at least one snack.  If you're hiking in the spring or fall, be wary of ice chutes and snow conditions.  It may be warm and sunny where you're from, but full of snow at the summit.  I have had one personal friend fall down an ice chute, and it can be very dangerous (not to scare anyone out of this hike, just be careful!).  The San Gabriel Mountains are known for being underestimated, so please give them the respect they deserve.

If you're looking for something different, you can continue on the Silver Moccasin Trail towards Dawson Saddle, which connects to Highway 2.  It's a 4.3 mile hike from Mt. Baden-Powell to Dawson Saddle, so the total hike would be 8.3 miles, which is just three-tenths of a mile longer than if you went back to Vincent Gap parking lot.  If you go this way with a group, you could potentially stage a car at either trail head.  I have never gone this way for a day hike, so if you have, please leave me a comment to tell me how it went!

And, after your hike, you have a nice easy drive off the mountain.  (Maybe just stop in town for some grub first!)


Views of the desert to the North are visible once you reach about 8,500 feet.

My husband on the trail.  Like I said, pretty steep!


Feel free to comment if you hiked Baden-Powell recently.  You can let others know about current conditions, etc.

Thursday, July 3, 2014

Weekend Getaway: Zion National Park

I love to travel.  I love to get outside.  I really, really love to get outside when I travel.  I was blessed with the opportunity to get away for the weekend recently and enjoy Zion National Park with my family.  For those who live in Southern California, driving to Zion is possible in a weekend.  We went during a holiday weekend, but we wanted to avoid the traffic, so we went for three days (which you could do on a regular weekend).  You have the option of camping in the park, staying in a hotel in Springdale (which is right outside of the park), or in a nearby surrounding area.  We stayed in St. George this time, which was a great option.  We rented a cabin from the KOA which was very reasonable, and about a 40 minute drive to the National Park.  There are a lot of services and restaurants in St. George (though some of my favorite places to eat are in Springdale).
Arch at the top of Hidden Canyon Trail in Zion

Over the weekend we went on several hikes.  The highlight for me was hiking up Angels Landing.  For those unfamiliar with this hike, it entails a portion with very high drop-offs on either side (there are nothing but chains protecting you in some portions).  Like I mentioned, we went on a holiday weekend and the hike was extremely CROWDED!  This was a little disappointing to someone like me who isn't particularly fond of large crowds, especially when I am out in nature, but it had the benefit of an added challenge and was a very interesting experience.  That being said, I wouldn't recommend this hike on a busy holiday weekend if possible.  It was certainly more dangerous had there not have been so many hikers, and it took much longer.  Now I have a clearer vision of what it would be like on Everest as climbers bottleneck at fixed ropes (minus the extreme cold... and altitude... and bottled oxygen... OK, maybe I just have a clearer idea of what it's like to wait a long time for other hikers to pass while on a steep, one-way trail).  All in all, I would highly recommend this hike to those without a debilitating fear of heights.  Definitely one of the classics.
View from the top of Angel's Landing
Look at all the people!  It was impossible to get a photo without a human being in it!


What's great about a day full of hiking is the guilt-free dining that follows.  Springdale, Utah is full of delicious, hip restaurants to fulfill all those downhill cravings, and many with a view to die for.  One of my husband and my favorites is Oscar's (make sure you order the homemade carrot cake).  Sitting outside on the patio with a view of the red rocks basking in the sunset glow is an experience of luxury, especially while sipping on a Margarita!
View of Zion from Springdale, Utah

Besides places to fill your belly, Springdale also has some lovely shops.  Artist galleries, guide services, and souvenir shops make a great cap off to the night, and may help burn any lingering calories from dinner.

On our last day in Utah, we checked out St. George.  We explored Snow Canyon State Park on Sunday morning for a few hours.  It's a great little park, and there were less crowds there than Zion on a busy holiday weekend.  I would love to come back and spend some more time there, especially to try some of their sport climbing routes.
Snow Canyon State Park, St. George, Utah


After mostly driving through Snow Canyon (except for a little 1 mile hiking loop), we headed over to the Mormon temple in St. George.  We couldn't go inside the actual temple, but we were tourists and checked out the exterior and explored the visitor's center.  It was very interesting to see, and learn about the history of building the temple.  I learned about what goes on inside the temple as well, which I found fascinating.
St. George Mormon temple.  Apparently they paint it every year so it stays dazzling white!

I hope those who live near enough to drive to Zion don't hesitate to visit in a weekend.  The drive isn't as far as you might think, and IMHO it is well worth it.

Cheers!

Tuesday, June 17, 2014

Acorn Trail

I would like to start a series of blog posts about hikes in and around my hometown of Wrightwood, California.  Nestled in the San Gabriel Mountains above L.A., we are blessed to be surrounded by fantastic hiking.  My hope is that this will be beneficial to both local residents, and visitors.  I am going to start with a somewhat lesser-known trail called Acorn Trail since my husband and I just hiked it today.

The trail head is accessible from a residential area at the top of Acorn Drive.  The very top part of Acorn Drive is private, and there are signs posted that parking is not allowed on this portion of the road.  It is advised to park on the street below these signs (which are around Camp Mariastella).  Click here for a link to more trail info and map.

Acorn Trail is about 4 miles round trip (depending on where you park your car), and relatively steep.  From the actual trail head, it is 2.1 miles to the top.  Remember that it will be a bit longer, however, to walk from where you park (The sign at the bottom of the trail says that there is an elevation gain of 1,500 feet).  I would rate the trail moderate in difficulty.  There are lovely views of the desert to the North, the crest of the surrounding mountains, and the landslide area.  All in all, we REALLY enjoyed this hike.  It's not too long, so I think we may hike this trail more often in the afternoon.  It took us about 2.5 hours round trip, and we were taking it easy.

If you would like to use the Acorn Trail but are interested in getting more miles in, it would be simple to either continue on the Pacific Crest Trail, or hike up Pine Mountain.  Once you reach the top of Acorn Trail, you could head either east or west on the Pacific Crest Trail (PCT), depending on if you want to go to Mexico or Canada ;)  If you walk along east along the dirt road at the top of the Acorn Trail, you will connect to Pine Mountain Trail shortly.  We will be hiking this trail soon, so stay tuned for a report!

One reason we hiked the Acorn Trail today is because it was so windy.  For the most part, we weren't exposed on a ridge line.  We had planned on hiking Pine Mountain, but the last time I hiked that trail it was very windy, so much so that my foot flew with the wind with each step!  We decided to save that hike for a calmer day.

If you have any questions about Acorn Trail, be sure to leave me a comment!

Tuesday, June 3, 2014

Yoga Selfies

I have discovered a new fad... the Yoga Selfie.  At first I was resistant to any and all selfies, but I started following yogis on my Instagram, and discovered I was inspired and learning more about yoga poses and yoga in general.  In my book, anything that inspires and teaches is a good thing; hence, my standpoint on Yoga Selfies (and selfies in general, I suppose) was forced to shift.

I read an article this morning that criticized the Yoga Selfie fad.  It claimed that it was creating a shift in yoga that was too far away from yoga's original purpose.  It claimed That the Yoga Selfie encourages the ego and hence it is B-A-D, bad.  I liked the article; I thought it was balanced and had a good point.  But it doesn't mean I am going to stop participating in challenges and posting Yoga Selfies.  Why?  Because I believe in my life, the benefit of these yoga photos outweighs the negatives.  And, let's face it: we do live in a technological age.  In fact, my New Year's Resolution was to stop being so dang technologically resistant!! (Which is why I started writing a blog, and opened a Twitter and Instagram account).  I came to the realization that if I don't hop on this technology bandwagon, I am going to be left in the dust!


All this is not to say that Yoga Selfies may have the potential to encourage the ego.  I think that if you are posting these photos in order to increase your self-worth, then that is the incorrect motivation.  But, if you are doing it in search of a community and a place to learn new things and go deeper in your practice, then why the heck not?!  I can tell you that this has opened me up to a whole new sense of community, challenged me like I have not been challenged, and taught me new concepts (i.e.- I have found this is a great way to learn the Sanskrit names of the yoga poses).

All of this may be true especially for me and those like me who do not belong to a yoga studio.  I practice at home through my yogatoday.com membership.  I am already connecting through technology via streaming videos in a way that yogis have not for thousands of years.  It makes sense to find community in a new way as well.  And really, all this does is make yoga more accessible to everyone, everywhere.  And that, is never a bad thing.

Namaste

Saturday, May 10, 2014

Hiking in my Hometown

My first love for the outdoors came through hiking.  I remember being about seven years old and hiking out my backyard with my brother and my dad had a blast (minus the fact that my brother managed to accrue a tick inside his belly button).  I now participate in many other outdoor activities, but hiking remains one of my favorites.  It's so accessible, easy, and fun.  All you really need is a decent pair of shoes and some water, and you're set to go!

Now that the weather has warmed and there are longer days it's easy to go for a quick hike after work.  Recently some friends and I did just that.  We set out for a popular local trail called Blue Ridge Trail in seek of a beautiful sunset location. We found just that!

My Experience with Minimalist Shoes

In light of the recent court decision for Vibram FiveFinger shoes, I thought it timely to talk about my personal experience with minimalist shoes. My hope is that this would start a discussion with other folk's personal experiences.  Granted, all these testimonies would be anecdotal, and not scientifically-backed (which is why Vibram lost the court case, they did not have scientific research to back up their claims).  But, that being said, in my personal opinion, I do not think personal testimonies should be discounted.  We live in a world that puts science above all else, and I question that approach in our society.  Not to say that I don't love science (I am becoming a science teacher, after all), I just think we should take a moment to step back and admit that we may not see the whole picture all the time.  There are, after all, many contradicting studies out there.  All this to say, take what you read here, and elsewhere with a grain of salt.  But, I digress...

I bought my one and only pair of minimalist running shoes a little over a year ago today.  I didn't go for the Vibram Five Fingers, because they felt odd on my feet (I believe my toes are just not made for that kind of shoe).  Instead, I splurged for the Merrel Dash Glove.  It took some getting-used to, and I had to return my original pair for a larger size because I found that when I ran, my feet felt squished, though they felt great just for walking.  They are the most expensive running shoes I have bought to date, and so they felt like quite a gamble.  I wasn't sure how I would adjust to having no padding under my feet, what's more, I wasn't sure if that was even a good idea.

The only reason I ventured to give them a try was the vast amount of personal testimonies I heard that praised the wonders of minimalist running shoes.  When the trend began, I (along with the vast majority of folks) thought the concept and look was ridiculous.  But I worked as a canopy tour guide, and people came on the tour wearing these shoes in droves.  Out of sheer search for conversation, I would ask these trend-followers how they liked their shoes.  The answer always gave praise to the wonders of the minimalist shoe.  Back problems were better, knees stopped aching, ankles became strong, balance increased.  After hearing enough of these stories, I was convinced enough to give them a try.  I figured I didn't have anything to loose, since was purchasing them at REI (I could always return them).

Lo and behold, I was soon among those proclaiming the miracles of the minimalist shoe.  It took me a while to work back up to the mileage I was at before the shoe.  I went from running four miles comfortably, to not being able to run 3/4 of a mile without my calves being on FIRE!  But once I worked my way back up, I noticed that I was having less knee problems, better balance, and most importantly, my hips have not giving me problems since strapping on my Merrels.  I have always had issues with my hips hurting when I run, or even when I go on long hikes.  This issue has all but disappeared, except for on exceptionally long hikes.  I don't know exactly how it happened, but I believe the the minimalists have strengthened muscles I didn't use with a traditional shoe.  Additionally, my yoga practice has seen benefits from my minimalists.  My balance has increased, undoubtedly due to the muscles in my ankles, calves, and thighs improving.

As a disclaimer, I am not a hard-core runner.  I don't know if I would recommend minimalists to marathoners, for example.  I only run to ensure that I have done some cardio, and to tire out my energetic Siberian Husky.  I wouldn't call myself an expert in the field, but I do know what minimalist shoes have done for me.  I am curious, what are your experiences with minimalists?